Before you start
- One clear portrait
- A supported audio file with finished narration
- An active paid workspace for generation
Use a finished recording
Uploaded-audio mode uses the recording as the presenter’s speech. Its words, pauses and pronunciation carry into the video. Typing a different script does not change an uploaded file; replace the recording when you want different speech.
This article covers preparing and attaching audio. If you have not created a presenter before, follow the custom-avatar guide for the complete image-to-video workflow.
Check the audio file
The uploader accepts MP3, WAV or M4A. Check the duration limit displayed in your workspace before preparing a long recording. A clear voice recording is easier to review than a track that already includes music and sound effects.
- Listen for missing words, clipping, clicks and long accidental silences.
- Keep the microphone distance and speaking volume consistent. Leave natural pauses between ideas.
- Trim the beginning and end without cutting off speech. Check the saved file after trimming.
- If you use a speech model in Workflows, create and approve the whole narration first, then use its audio asset in Talking Head.
Add or replace audio on the portrait
Add the portrait first. The audio controls belong to its avatar card. In a setup with several avatars, check that the correct recording is attached to each one.
- Open Talking head and switch to uploading audio if the script field is showing.
- On the portrait card, upload your recording or choose an existing audio file from Assets.
- Use the audio player on the card to listen to the selected file. Check the filename and the ending.
- Use Replace when you need a corrected recording. Select Assets if the approved version is already in your workspace.
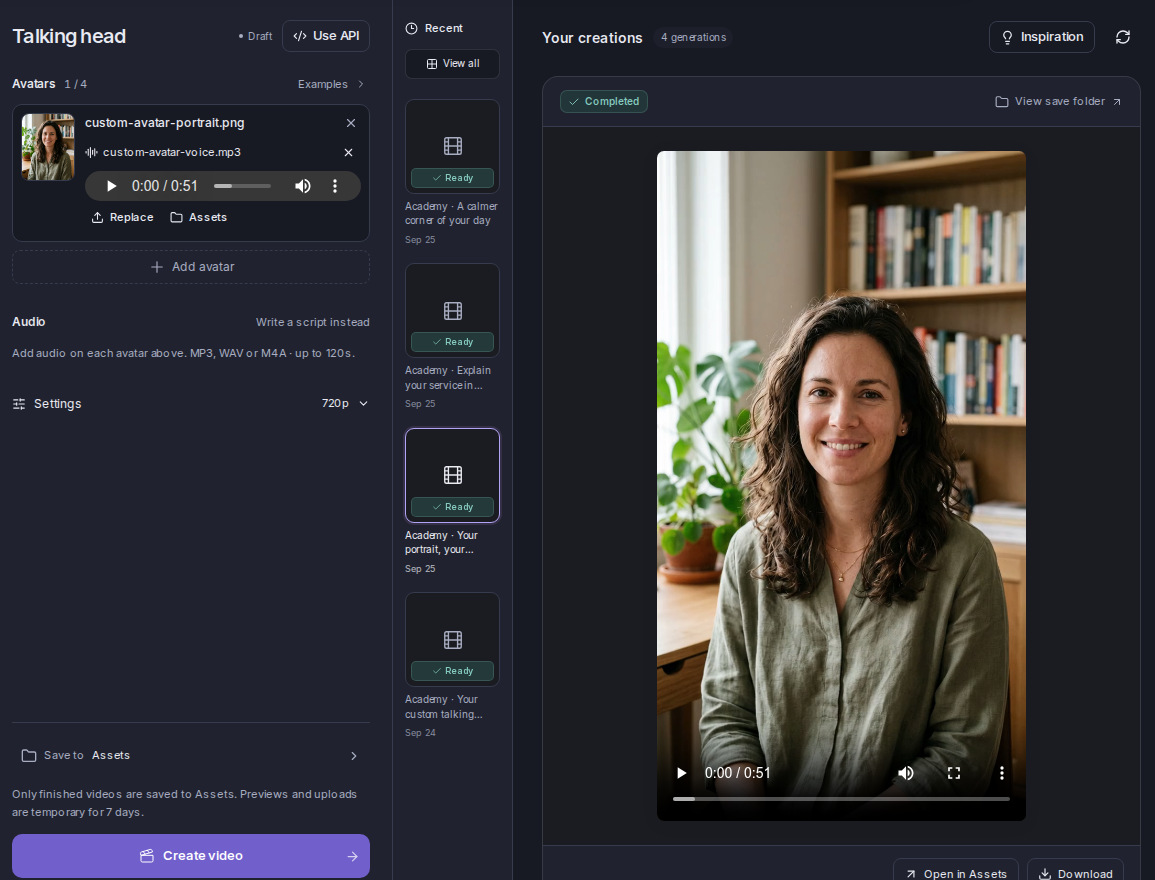
Watch these steps in Mozify 2:20
A silent walkthrough of the real app: add the portrait and audio, check the quote, review a completed run and open the Editor. On-screen instructions are included; generation waiting time is omitted.
View the finished example, script and inputs →Review playback and the quote
The file’s measured duration matters when you review the video quote. If a recording is too long, shorten the message and upload the new version. Changing the script field will not shorten it.
When both the portrait and narration are ready, check the resolution and select Create video. Review the quote before confirming. When the run completes, compare its speech with the source recording at the beginning, middle and end.
If the upload or sound is wrong
Read any upload error before trying again. Check the accepted format and duration shown in the tool, and confirm that you selected the intended file. If an audio asset is missing, check which workspace you are in.
If you hear a doubled voice only after editing, the Editor may be playing the presenter clip’s audio and a separate narration track together. Mute one copy. If the source already has a wrong word or an abrupt pause, correct the recording before generating another presenter.
See the finished example 1:07
Explain who you help, how you work and what a prospective customer should do next. This demonstration uses a fictional AI presenter.
Script, source inputs and production details →