
Before you start
- Approved presenter and supporting assets in your workspace
- The original narration for edits with cutaways
- A paid workspace for export
Choose the format and the order
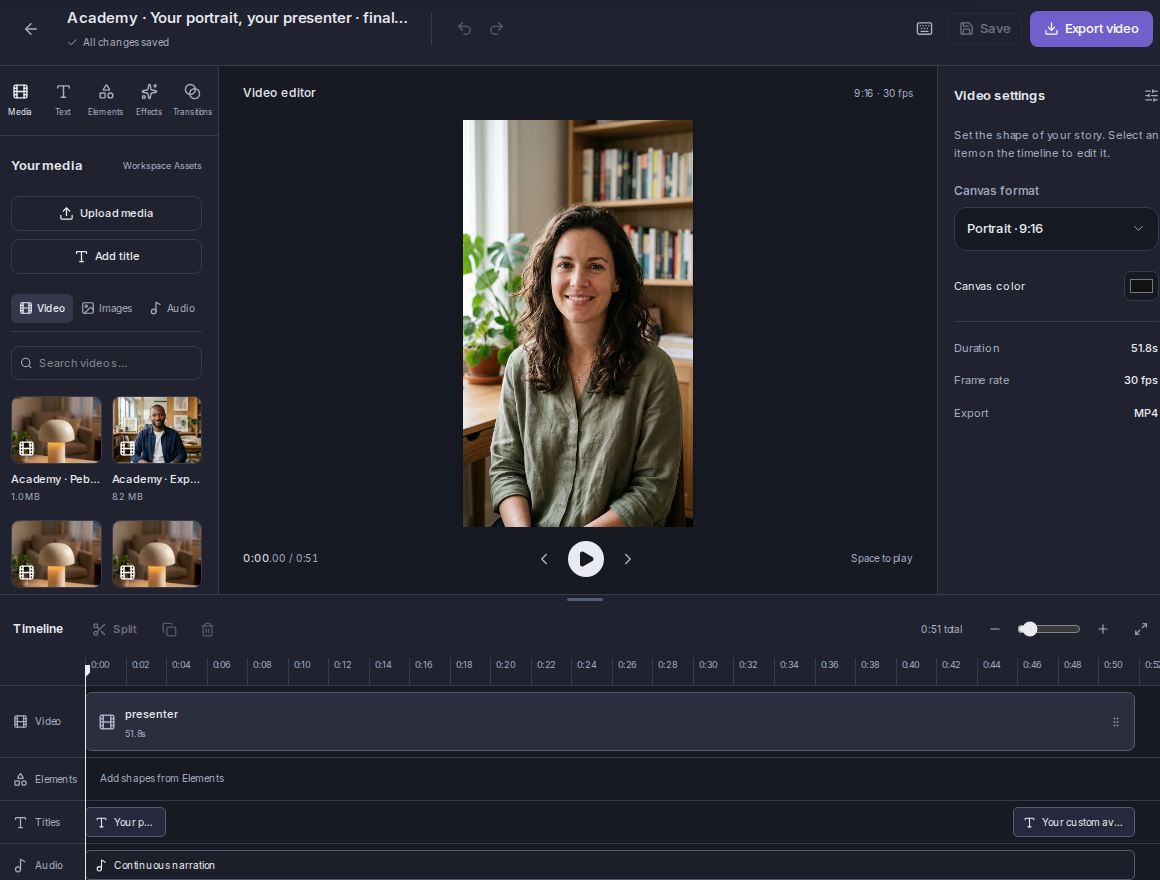
Open Video Editor and create a project. Choose the aspect ratio for the destination before assembling the full timeline. A vertical product ad and a landscape explainer use space differently. Check how each source fills the canvas instead of assuming that changing the ratio preserves the original framing.
Put your clips in story order. Use the presenter to introduce the idea, product footage to support a specific sentence, and a clear closing frame for the CTA. Trim irrelevant pauses while keeping the audio intelligible. A transition is optional; a simple cut often makes the sequence easier to follow.
Keep one continuous voice
For an uninterrupted presenter video, its original audio may be enough. When you alternate presenter and product clips, place the original narration on a separate audio track and mute the duplicate voice in the presenter clips. This keeps the sentence continuous while the visual changes.
Line up the source trims carefully. A presenter segment from the end of the recording must appear at the corresponding moment in the narration. Moving a speaking segment to a different sentence will make the mouth and voice disagree, even if the original generation was well synchronized.
- Add the full narration once at the start of the audio timeline.
- Set presenter clip volume to zero if that same narration is already on the audio track.
- Trim each presenter section to the matching portion of the recording.
- Fill the intervening visual moments with the relevant product clips.
- Play across every edit to check continuity before exporting.
Add titles that support the message
Use a short opening phrase and a specific final action. Keep text inside comfortable margins and away from the speaker’s face. Review on a narrow screen; text that looks restrained on a desktop can cover too much of a vertical video.
Long captions and short promotional titles have different jobs. The Knowledge Base provides caption files for accessible website playback. The titles in an Editor export are part of the video itself. Check the tools currently available in your workspace instead of assuming that website captions mean automatic caption generation in the Editor.
Export at a sensible resolution
Review the timeline duration, format and export settings. Our Knowledge Base sources and exports report their actual measured resolution. A larger export canvas does not create missing source detail. Start with the output quality you need and avoid describing an upscaled source as native high-resolution generation.
Submit the export and wait for it to complete. Keep the project so you can adjust titles or cuts without rebuilding the whole sequence. Editing existing assets and generating new ones are different actions; check the plan and generation quotes for the work you intend to do.
Watch the downloaded result
Open the completed MP4 outside the editing preview. Check that it begins cleanly, every title appears long enough to read, the narration continues across cutaways and the final sentence is not cut off. Listen on headphones and on a phone speaker.
For a new hook, you may be able to reuse much of the visual edit. Save a clearly named version and keep a note of the script and source assets. The UGC example shows the generated pieces and final assembled video separately so you can see exactly what the Editor contributes.
See the finished example 0:34
Give a product a clear story with a relatable presenter and product cutaways. This demonstration uses a fictional AI presenter.
Script, source inputs and production details →